
How to enable Two-Step Verification for Microsoft
1. Locate 2FA Settings
Sign in to your Microsoft account, click on your account icon at the top right of the screen, and click My Microsoft account from the drop-down menu.

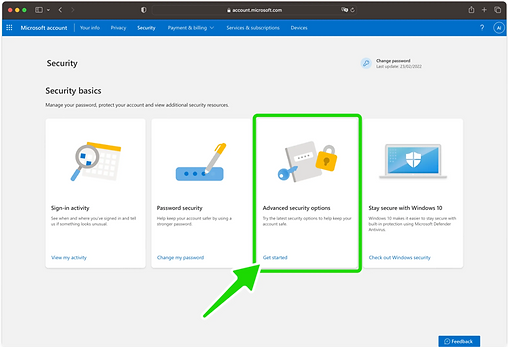
2. Security dashboard
Under the Security section click on Security dashboard button.

3. Get started
Locate Advanced security options and click on Get started.
4. Turn On
Locate Additional security section, and under the Two-step verification click the Turn on button.

5. Next Step
Click on Next button to continue.

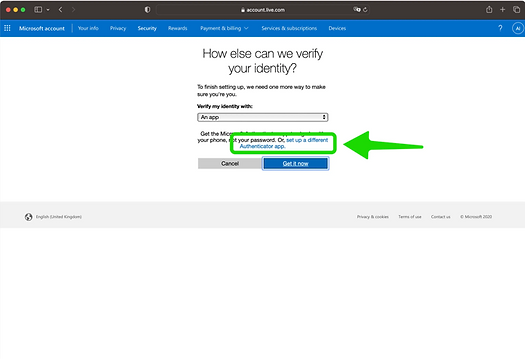
6. Different Authenticator App
Click on set up a different Authenticator app.
7. Set up Two-Step Verification
In this step is shown the QR Code that contains the secret key which you need to scan with SecretApp Vault. Keep the page open as you reach for your device.
Note: Do not scan the demo image shown below.

8. Add account to Secret App vault
"Scan a QR code" or "Enter a setup key" to add account to SecretApp Vault. SecreApp Vault will automatically choose the Microsoft logo and autofill account name and secret key to save
9. Confirm OTP code
Returning to the Microsoft web page, type in the six digit code from SecreApp Vault in the appropriate field. When done click Next.

10. Next
Click on Next button to proceed to final step.

11. Done!
You have successfully enabled two-factor authentication(2FA) to protect your Microsoft account, from now on, you will need to use the SecretApp Vault when you would like to log in to your Microsoft account. Press on Finish and that's all.
